What this does
Shaders are a great tool to creatively expand the look and feel of meshes in your game, but sometimes you need more flexibility.
However, fullscreen shaders allow users to make effects that holistically affect the entire render of the camera, similar to post processing effects. The only problem is that sometimes, you want this functionality, but you only want to apply it to one object (for example, blurring, outlining, or selectively color-grading specific objects, etc.).
That's where a screen space object mask comes in!
Conceptional overview
If you are familiar with the HDRP render pipeline (click here to check out their docs), you might have heard of custom passes. They completely open the door for creating custom rendering solutions within Unity by injecting certain rendering commands into the render pipeline. For example, you can change the appearance of materials in your scene, reorder how objects are rendered, and send camera buffer data directly to shaders upon request.
How to do it
First off, HDRP's API has changed a lot over the past few years, making it difficult to reference old forms or repositories like this one, so for consistency’s sake, I will be using Unity 6.3 with HDRP 17.5.
Create a Custom Pass Volume
In your Unity scene, right click on the Hierarchy and click on Volume > Custom Pass. In the Inspector, set the Injection Point to After Post Process. This allows all of the camera's normal rendering to happen first, and then we can pull from that data.
Create the Custom Pass C# script
In your scripts folder, create a new MonoBehaviour script and paste these contents:
using UnityEngine;
using UnityEngine.Rendering.HighDefinition;
using UnityEngine.Rendering;
using UnityEngine.Experimental.Rendering;
using UnityEngine.Rendering.RendererUtils;

[System.Serializable]
public sealed class MyCustomPass : CustomPass
{

	protected override void Setup(ScriptableRenderContext renderContext, CommandBuffer cmd)
	{
	}

	protected override void Execute(CustomPassContext ctx)
	{
	}

	protected override void Cleanup()
	{
	}

}
Custom passes act similar to MonoBehaviours, where you have a Start, Update, and OnDestroy method, but the HDRP API gives you a Setup, Execute, and Cleanup.
First, we need to create the variables at the top of the class:
[System.Serializable]
public sealed class MyCustomPass : CustomPass
{
	// Allows you to select which layer of objects should be encompassed by this mask
	// This will be modifiable in the Unity editor
	[SerializeField] private LayerMask maskLayer;

    // Which material we should send the mask data to
    // This will be modifiable in the Unity editor
	[SerializeField] private Material material;

	// RTHandles (AKA Render Texture Handles) are specific types of textures that hold the rendered output from a camera
	// Both render textures will be sent to our material later for processing

	// The mask render texture will be a black and white image, where the white pixels are drawn wherever our objects specificed in the layer mask are
	private RTHandle maskRenderTexture;

	// The color render texture will be the exact color output from the camera, which will be modified in the shader by the mask render texture
	private RTHandle colorRenderTexture;

	private ShaderTagId[] shaderTagIds;
...
Now, we can create the render textures using the RTHandles.Alloc function in the Setup method:
protected override void Setup(ScriptableRenderContext renderContext, CommandBuffer cmd)
{
	// It is EXTREMELY important that the parameters of both the color and mask render texture stay the same.
	// The most significant takeaway is that the mask's render texture has `DepthBits.Depth8` for the `depthBufferBits` parameter.
	// This allocates space for Unity to record depth data into the texture, which is imperative for creating the mask.
	//
	// FYI: This render target has a depth buffer attached. In Shader Graph, when we sample the mask texture,
	// the depth-derived value shows up in the Red channel in order for us to derive the mask.

	this.maskRenderTexture = RTHandles.Alloc(
	    Vector2.one, // Scale Percentage on the X and Y and should remain at 100% or 1.0f
	    TextureXR.slices, // Compatibility with Unity's XR system and can remain the same.
	    dimension: TextureDimension.Tex2D, // Specifying the type of texture
	    colorFormat: GraphicsFormat.R16G16B16A16_SFloat,
	    useDynamicScale: true,
	    name: "Mask RT", // Can be any unique name
	    depthBufferBits: DepthBits.Depth8 // IMPORTANT! THIS IS HOW UNITY KNOWS HOW TO RENDER DEPTH TO THE TEXTURE
	);

	this.colorRenderTexture = RTHandles.Alloc(
	    Vector2.one,
	    TextureXR.slices,
	    dimension: TextureDimension.Tex2D,
	    colorFormat: GraphicsFormat.R16G16B16A16_SFloat,
	    useDynamicScale: true,
	    name: "Color RT"
	);

	// Shader tag IDs identify which pass inside a shader is allowed to render.
	// When a Custom Pass builds a list of objects to be included in the mask, HDRP checks each object’s material
	// and only renders it if the material has a pass whose `LightMode` tag matches one of the provided `ShaderTagId`s.
	//
	// If your custom shader does not have a ShaderTagId added to this list, any objects with that material will NOT be drawn to the mask texture.
	//
	// Below are the most common ShaderTagIds used by Unity:
	this.shaderTagIds = new ShaderTagId[]
	{
	    new("DepthOnly"),
	    new("MotionVectors"),
	    new("TransparentBackface"),
	};
}
Next, we must set up our Execute function, which has a lot of components, so bare with me.
First, the function gives us a parameter of type CustomPassContext, which allows us to pull a lot of useful rendering data. Coincidentally, the CustomPassContext already contains a render texture of the camera's color render texture, BUT it must be copied into the colorRenderTexture that we just created because Unity does not allow it to be read directly by our fullscreen material in this context. This is what that looks like:
protected override void Execute(CustomPassContext ctx)
{
	// HDUtils is an HDRP API class that has many helper functions for creating custom pass features.
	// In our case, we want to "blit" (which means to copy pixels) from the camera's render texture into our own render texture.
    HDUtils.BlitCameraTexture(ctx.cmd, ctx.cameraColorBuffer, this.colorRenderTexture);

    // NOTE: Other helper classes exist like CoreUtils, etc.
    // NOTE: `ctx.cmd`, also known as the Command Buffer, is a tool that executes commands based on the current Custom Pass Context.
...
That's all that we need to do with our color render texture. Everything from here on out will pertain to the mask render texture INSIDE the Execute function. Writing to the mask texture is not the same process as writing to the color texture. In the color render texture's case, it already exists, and we're just making a copy of it. In the mask render texture's case, we have to issue a second draw of scene geometry from the main camera’s perspective with these new properties. Here are the steps to do that:
- Let Unity know that our mask render texture is the target to be rendered to:
CoreUtils.SetRenderTarget(ctx.cmd, this.maskRenderTexture, ClearFlag.All);
- Then we must create what's called a
RendererListDesc, which is a class that gives Unity certain parameters to render scene from the main camera's perspective:
// This is where we specify the shader tag list
var desc = new RendererListDesc(this.shaderTagIds, ctx.cullingResults, ctx.hdCamera.camera)
{
    layerMask = this.maskLayer, // Tells Unity to only render the objects on the mask we specified
    renderQueueRange = RenderQueueRange.all // Includes Opaque and Transparent objects
};

var list = ctx.renderContext.CreateRendererList(desc);

// This function is what renders the scene and outputs to the mask texture
ctx.cmd.DrawRendererList(list);
- Send the textures over to our material to be processed:
// We will create the "_Mask" and "_Source" parameters in shader in the next step.
// They can be named anything, as long as they exactly match the name of the parameter ID in the shader.
this.material.SetTexture("_Mask", this.maskRenderTexture);
this.material.SetTexture("_Source", this.colorRenderTexture);
- Finally, we must draw the scene like so:
// Here's what's happening:
// When we pass the mask and color render textures into the material, it will process the textures and give us a final result.
// That result is what we *copy* into the `ctx.cameraColorBuffer`, allowing it to be shown on-screen.
HDUtils.DrawFullScreen(ctx.cmd, this.material, ctx.cameraColorBuffer, shaderPassId: 0);
Lastly, we must clean up our textures in the Cleanup function:
protected override void Cleanup()
{
    this.maskRenderTexture?.Release();
    this.colorRenderTexture?.Release();
}
And we're done! Now, head back to the Unity Editor and click the plus sign under the Custom Passes property. You should see the name of the class you created as a field. Click on it, and it will automatically be added to the list. Now, you will see a bunch of properties underneath your custom pass. You can ignore all of them except for the Mask Layer and the Material. Set the Mask Layer to whatever layer you would like. Just make sure that only the objects included in the custom pass are on that same layer.
In the next step, we will create the material to be used in the custom pass.
Create the fullscreen shader
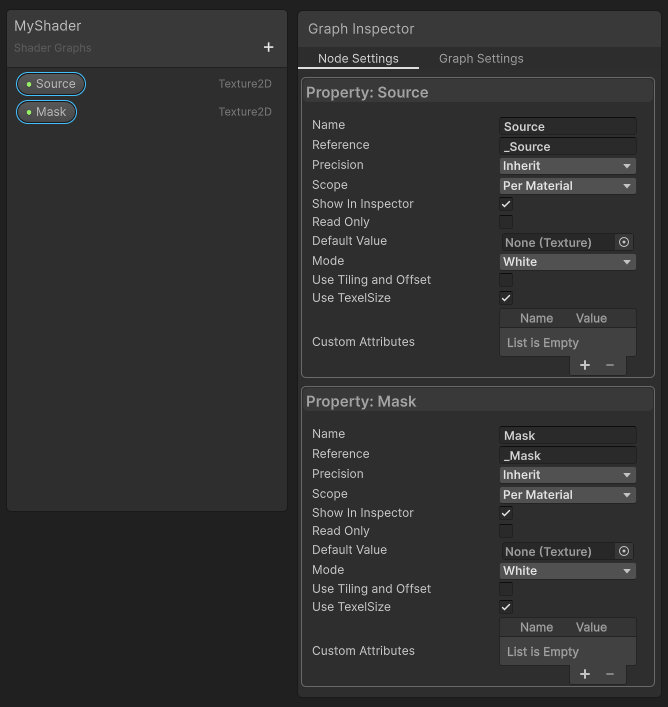
Although you can create a custom HLSL shader, we will be using Shader Graph for this tutorial. Create a new shader graph shader in your Shaders folder in the Project panel via Create > Shader Graph > HDRP > Fullscreen Shader Graph. Open the shader and add two properties of type Texture2D called Source and Mask. Make sure that the Reference is the exact same as the the strings in Step 3 of the Execute function.
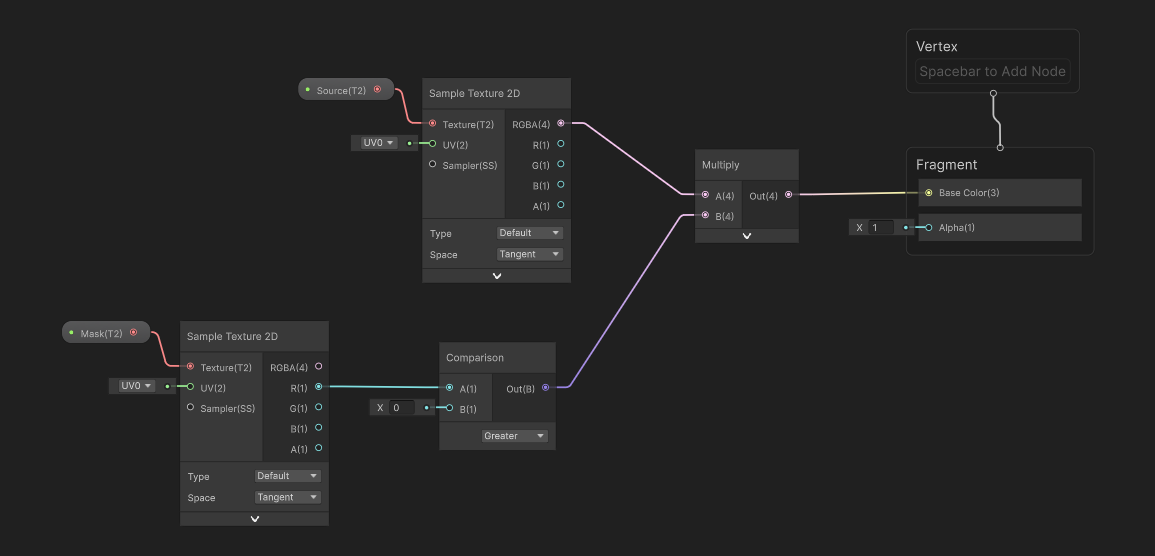
Now, using the node setup below, you have a decent base for masks within the shader that can be used for any number of cases. The only thing left to do is create a material from this shader and drag it into the Material slot in the Custom Pass Volume GameObject that we created earlier.
Notes:
- Keep in mind that the mask's Sample Texture 2D ONLY outputs from the Red channel, as seen in the screenshot.
- The comparison node is vital to make the mask black and white because, like previously mentioned, the mask by itself is technically a depth texture, so brighter pixels indicate closeness to the camera.
- This particular setup multiplies the source texture by the mask, meaning that the only thing that will be drawn onto the screen is the objects on the mask layer while everything else is black.
If you have any questions, please feel free to email support@criticalanglestudios.com. Happy coding!